Powder coating is a popular coating method that use to protect and enhance the appearance of metal objects. This method involves the application of a dry powder on the surface of the metal object and then curing it with heat.
The powder coating process offers several advantages over other coating methods, such as durability and resistance to scratches and chipping. Powder coating is a cost-effective and efficient way to protect your metal objects from corrosion and other forms of damage. Powder coating is an excellent alternative to traditional liquid paint as it provides a durable finish that can withstand harsh weather conditions and other forms of wear and tear.
We will cover everything you need to know about method of powder coating, including the various types of powder coatings available, the process involved in applying it, and the limitations you should consider before opting for this method. We will also discuss the applications of powder coat finish in different industries.
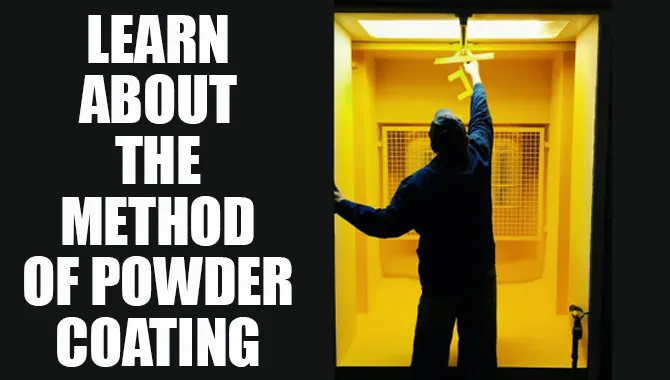
What Is Powder Coating?
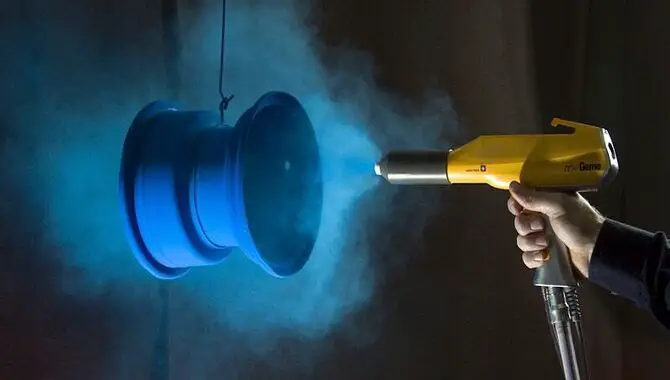
Powder coating is a method of applying a durable and protective finish to a variety of metal surfaces. Unlike traditional liquid coatings, which are applied with a brush or spray gun and then cured in an oven. Powder coating involves applying a dry powder to the surface and heating it until it melts and forms a smooth, even finish.
This process creates a strong bond between the powder and the metal, resulting in a coating that is resistant to chipping, scratching, and fading. Powder coating is commonly used in the automotive, aerospace, and construction industries. But can also use for smaller-scale projects such as furniture or household items.
With its durability and versatility, powder coating has become an increasingly popular choice for those looking to protect their metal surfaces from wear and tear.
In Details Ways To Method Of Powder Coating On Your Vehicle To Get Durable Finish
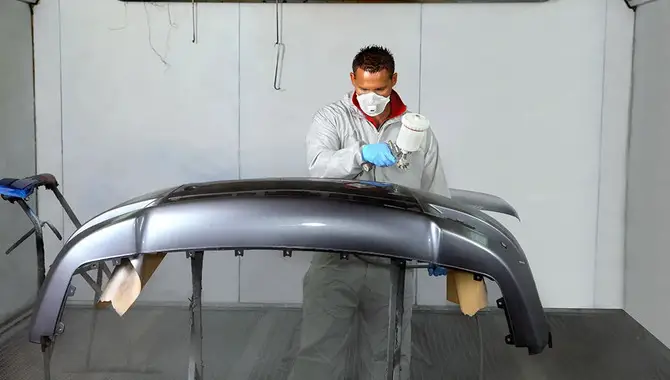
Powder coating applies a decorative or protective finish to various surfaces, including metal, wood, and plastic. The process involves applying a dry powder to the surface and then curing it with heat to create a hard, durable coating. Powder coating is popular for providing superior protection against corrosion and wear, making it an ideal choice for outdoor applications. It also offers various colour options and finishes, from matte to high gloss.
Powder coating is a popular method for adding a durable finish to vehicles. The process involves applying a dry powder to the vehicle’s surface, which is then heated and cured to create a hard, protective layer. Here are some detailed steps for powder coating your vehicle. By following these steps, you can achieve a durable and long-lasting finish on your vehicle using method of powder coating.
Types Of Powder Coating
Various types of powder coats are available for different purposes depending on the application requirement. For example, if you need a tough chemical-resistant finish for your metal parts or substrate, then using thermoplastic coatings is the way to go. For a harder and more durable finish with properties like abrasion resistance and good chemical bonding, go ahead with thermoset coatings.
If you require high UV resistance with good colour retention characteristics, then picking polyester coatings will also be advantageous while providing an eco-friendly option. Epoxy coatings provide excellent adhesion and corrosion resistance, making them perfect for machinery or exercise equipment applications. Choosing metallic powder coatings is the next step if you want to add a metallic appearance plus durability.
Thermoplastic Powder Coat Finish
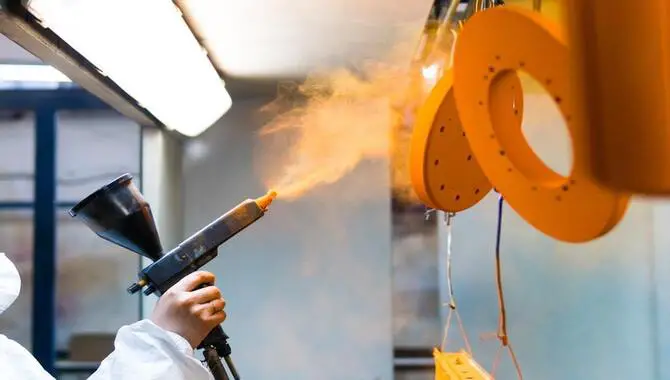
With its chemical composition of plastic resins and polymers and thermoplastic powder coating. It is one of the most durable types of coatings available. Its ability to resist chemicals and impact makes it ideal for various applications, including automotive parts, fencing, exercise equipment, appliances, and shovels.
While this type of coating is used primarily for outdoor applications due to its ability to withstand harsh weather conditions. It can also use on metal, plastic or even wood surfaces. The electrostatic process is used in applying thermoplastic coatings. Ensures good adhesion properties that make it perfect for complex shapes and intricate designs.
Thermoset Powder Coat Finish
Thermoset powder coating is a type of coating that utilizes heat to cure the powder material. Creating a chemical reaction that results in a durable finish. This type of coating offers better resistance against corrosion and abrasion than liquid paints. It can withstand harsh weather conditions and chemical exposure, making it perfect for use in automotive applications.
The process involves charging powder particles electrostatically before being sprayed onto them. The grounded surface uses an electrostatic spray gun or fluidized bed machinery. After application, the coated metal part is sent through a curing oven, and heated uniformly until.
The dry powder melts into a smooth and even layer with chemical bonding. It can produce thicker coatings than liquid coatings without dripping or sagging during application. Thermoset powders are ideal for fencing, exercise equipment, appliances, machinery parts, and shovels.
UV Curable Powder Coat Finish
Powder coatings come in various types, with UV-curable powder coating being one of them. This specific type of powder coating involves using a dry powder that cures quickly when exposed to UV light. As a result of this process, the resulting coating is highly durable and resistant to fading, chipping, and scratching. The benefits of this technology extend beyond metal surfaces to include non-metallic options such as plastic and wood.
A major advantage of UV-curable powder coating is its eco-friendliness since it does not contain volatile organic compounds (VOCs). By providing excellent chemical bonding and thicker coatings than liquid paints. It helps make exercise equipment, fencing or shovels last longer while following environmental regulations.
How Does Powder Coating Process Work?
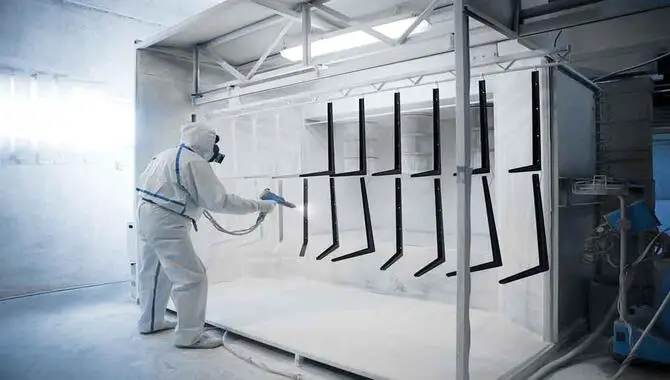
Powder coating is applying a dry powder to a metal surface electrostatically before being cured in an oven. The process involves cleaning and pre-treating the metal surface to ensure proper powder adhesion. Then, the powder apply using either an electrostatic spray gun or fluidized bed machinery.
Where it adheres to the charged metal surface. After application, the coated part is sent through a curing oven, where heat causes the powder to melt and fuse into a smooth and even layer for optimal chemical bonding. The resulting coating provides excellent durability, chemical resistance, and exterior factors like weather and wear and tear.
Pre-Treatment For Powder Coating
Pre-treatment is vital to ensure a durable and corrosion-resistant finish before applying powder coating on metal parts. A clean substrate free from contamination enables better adhesion of the powder coat. The thickness of coating depends upon various factors like types of powder coating and pigments. Additives used, and curing temperature in the oven.
Proper masking and grounding can minimize overspray during application. Powder coating is eco-friendly as it contains no solvents or volatile organic compounds (VOCs) that liquid paints have. Chemical bonding between electrically charged powder particles and grounded metal surfaces results in thicker coatings with excellent abrasion resistance.
Application Of Powder Coating Method
Powder coating is a coating process that applies a dry powder material onto a grounded surface through an electrostatic process. After the powder particles are charged with an electric charge, they adhere to the metal part due to chemical bonding.
In this way, thicker coatings can achieve without using solvents. Or pigments found in liquid paints, reducing overspray and contamination from grease or rust on machinery. After applying the powder coat onto the substrate, the next step is curing in an oven where chemicals react. Following a chemical reaction caused by heat or UV light. This curing process allows for stronger adhesion and a more abrasive-resistant finish than liquid coatings.
Curing Process For Powder Coatings
The powder coating process’s curing step includes applying a dry powder on the substrate’s surface and then heating it in a curing oven. At this stage, the powder particles undergo a chemical reaction and form an electric charge on the surface of the grounded metal part.
This charge initiates adhesion between charged particles and results in thicker coatings that are abrasion-resistant, rust-proof, and corrosion-resistant. Crosslinking of polymer resin occurs due to heat exposure between thermoset or thermoplastic coatings, resulting in an eco-friendly coating that adheres well without solvents or volatile organic compounds.
Limitations Of Powder Coatings
To ensure optimal adhesion and durability, it’s crucial to consider substrate selection and appropriate primer selection when applying coatings. Powder coatings have some limitations that must consider as well, including difficulties in achieving certain colours and maintaining uniformity on intricate shapes.
Proper surface preparation is critical before applying the coating to ensure good adhesion. Extreme weather conditions can also impact the longevity of powder coatings. Careful application techniques can help overcome these limitations and ensure high-quality results.
Considerations For Substrates In Powder Coating
When selecting appropriate substrates for powder coating applications, there are several crucial factors that you should consider. Firstly, you must ensure that your substrate can handle high temperatures during the curing process without causing damage or deformation.
Secondly, ensure that your surface is free from any contaminants or greases, as they can affect the adhesion of the coating. Thirdly certain materials like plastic or rubber cannot coat with this method. Lastly, evaluating your design’s complexity is essential since intricate patterns and shapes may require additional precautions while applying coatings.
Selection Of Appropriate Primer For Powder Coating
Choosing the right primer is crucial for achieving a long-lasting and corrosion-resistant finish using the ways of powder coating. The primer must be compatible with the substrate and powder coating material and have excellent adhesion properties for effective chemical bonding.
An incompatible primer may lead to poor adhesion, flaking, or chipping of the final coating. Therefore, selecting a high-quality primer specifically designed for use with powder coatings is essential. With proper pretreatment, application process, and curing conditions involving UV light or a curing oven, you can ensure a durable and eco-friendly finish on metal parts, fencing, appliances, exercise equipment, or MDF substrates.
Applications Of Powder Coat Finish In Different Industries
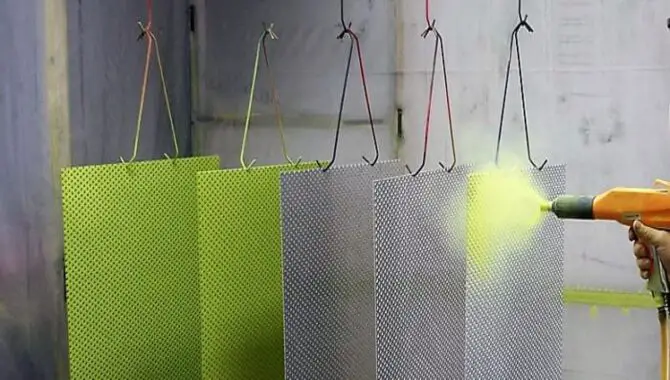
Industries rely on powder coating for a range of applications. The automotive sector uses this technique for its durable and resistant finish, while the aerospace industry depends on it to safeguard against harsh weather and corrosion. Exercise equipment, appliances, fencing, and shovels utilize it for both decorative and protective purposes.
The construction and architecture sectors depend on its weather-resistant characteristics, making it a sustainable alternative to liquid paints. This eco-friendly option also adheres to environmental regulations due to limited volatile organic compound (VOCs) emissions. Powder coating creates thicker coatings that offer better durability than liquid coatings with little or no overspray compared to traditional painting methods.
Conclusion
Powder coating is a durable, long-lasting finish for your vehicle that protects against harsh weather conditions, rust, and corrosion. It’s a process that involves applying a powder coat to metal surfaces through an electrostatic process, followed by curing the powder coat with heat.
Various types of powder coatings are available in the market, including thermoplastic, thermoset, and UV-curable powder coatings. Though it has its limitations, it’s one of the most preferred methods for coating vehicles due to its durability and resistance.
With its many advantages over other coating methods, such as durability, and resistance to chipping, fading and scratching, powder coating has become an increasingly popular option for industries ranging from automotive to consumer goods. By understanding the process and benefits of the method of powder coating, professionals can make informed decisions on how to best protect and enhance their products.
Frequently Asked Questions
What Is The Best Ways Of Powder Coating?
Choosing the best powder coating method relies on the material and desired outcome. Two popular methods are electrostatic spraying and fluidized bed dipping. Electrostatic spraying applies charged powder with a gun while fluidized bed dipping immerses parts in a powder bed. Seek professional advice for optimal results.
How Can I Tell Which Type Of Powder Coating Will Work Best For My Product?
To choose the right powder coating for your product, consider factors such as the material and intended use. Seek advice from a professional on which type suits your needs best, and consider properties like durability, resistance to corrosion and chemicals, and colour options. Conducting tests beforehand can help ensure compatibility.
What Are The Benefits Of A Powder Coating Over An Electrostatic Finish?
Compared to electrostatic finishes, powder coating provides superior durability and resistance against chipping, scratching, and fading. It is also more eco-friendly due to less waste and no harmful chemicals. Additionally, powder coatings offer a wider range of application possibilities and produce a smoother, more uniform finish.
Can Powder Coating Be Done On Other Vehicle Parts Besides The Exterior?
Powder coating is not limited to the exterior of a vehicle; it can also be done on interior parts such as wheels, engine components, and suspension parts. This method offers a more durable and long-lasting finish than traditional painting methods. Consultation with a professional recommendation for determining which parts can be powder coated.
How Long Can I Expect A Powder-Coated Finish To Last On My Vehicle?
With proper care, a powder-coated finish on a vehicle can last up to two decades. However, the longevity of the finish depends on factors like coating quality and vehicle maintenance. Regular cleaning and waxing can prolong its life. Powder-coated finishes are known for their high durability against scratches, fading, and chipping.
Bike blogging is my passion! I love to write about everything bike-related, from the latest news and trends to product reviews and how-to guides. If you’re into cycling, you’ll want to check out my blog.