Bicycling is a popular activity that not only provides excellent cardiovascular exercise but also allows you to enjoy the great outdoors. One of the essential components of a bike is its pedals, which transfer the power from your legs to the bike’s wheels.
Over time, pedals can become worn or damaged, requiring replacement. However, changing bike pedals can seem tricky, especially for those who are new to cycling or have never done it before.
Properly understanding how to change bike pedals can come in handy when you need to replace them. We will cover important topics such as left vs right pedals, greasing before installation, common mistakes to avoid during pedal fitting, and even how to fit cleats. Don’t let faulty pedals slow your ride any longer – read on for tips and tricks on changing your bike pedals.
Tools & Techniques On How To Change Bike Pedals
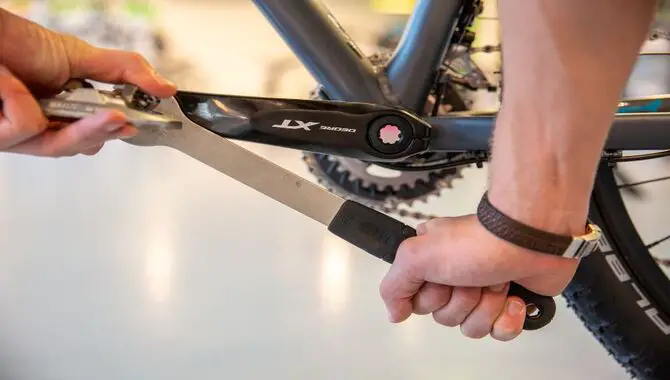
Changing bike pedals is a relatively simple process that can be done with a few basic tools. To change your bike pedals, you will need a pedal wrench or an Allen key, depending on your pedal type. You will need a pedal wrench if your pedals have a 15mm flat surface on the back.
If they have an Allen bolt on the end of the spindle, you will need an Allen key that fits the bolt. Additionally, it may be helpful to have some lubricant, such as grease or oil, to apply to the threads of the new pedals before installation. With these tools in hand, you’ll be able to change bike pedals easily and get back on the road. Here are the steps on how to change bike pedals in details.
Removing And Installing Pedals
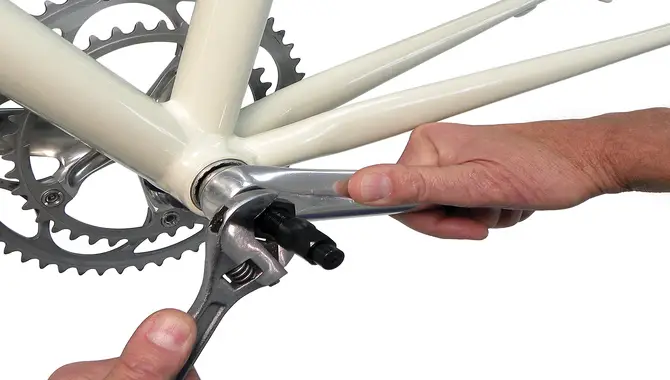
To remove and install your bike pedals, start by placing your bike in a stable position. Use the correct pedal wrench or Allen key to loosen the pedals, remembering that the left pedal has reverse threading. Once both pedals are removed, inspect the threads on the crank arms and clean them if necessary.
Apply grease to the threads of your new pedals and then screw them in by hand before tightening them with your wrench or Allen key. Remember to tighten the right and left pedal clockwise for optimal performance. After installation, test your pedals for secure attachment before heading out on your next ride.
Step 1: Removing The Right Pedal From The Bike
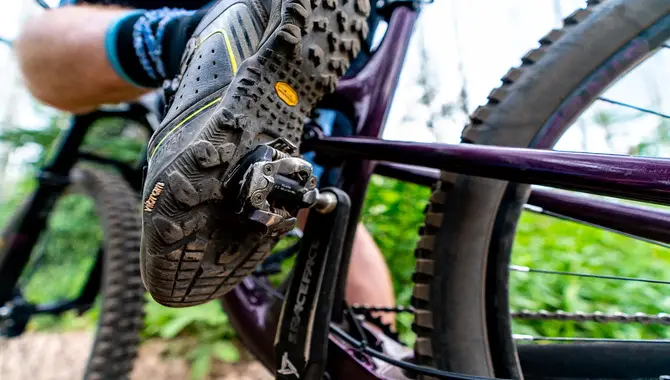
Changing the pedals on your bike can be a simple and easy process if you have the right tools and knowledge. To remove the right pedal from your bike, begin by loosening the pedal with a wrench in a counterclockwise direction.
It is important to remember that the right pedal is threaded normally, while the left pedal is reverse-threaded. Once you have loosened the pedal, continue turning it until it comes off completely. Be sure to clean and lubricate the threads before installing your new pedals to ensure a smooth and secure fit.
Step 2: Removing The Left Pedal From Bike
Replacing bike pedals may seem like a daunting task, but it’s actually quite simple. When removing the left pedal from your bike, it’s important to remember that the threads are reverse-threaded compared to the right pedal. This means you’ll need to turn the pedal counterclockwise to loosen and remove it.
To do this, use a pedal wrench or an adjustable wrench and place it on the flats of the pedal spindle. Apply pressure in a counterclockwise direction until the pedal is loose enough to remove by hand. Once removed, you can install your new left pedal (also remember to tighten it counterclockwise) and repeat for the right side. With a little bit of know-how and the right tools, changing your bike pedals is a breeze.
Changing Bike Pedals
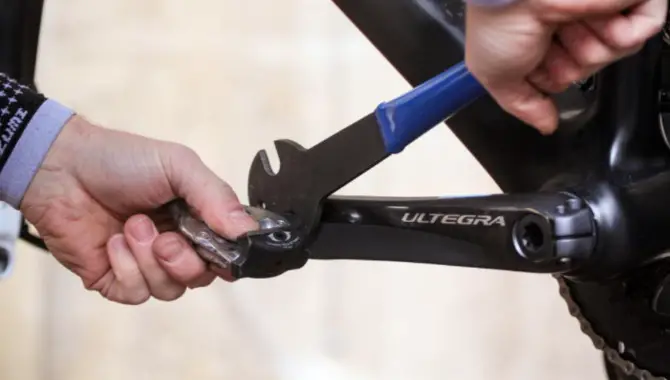
Changing bike pedals may seem like a daunting task, but with the right tools and knowledge, it can be a quick and easy process. To change your bike pedals, start by removing the old ones using a wrench in the correct counterclockwise direction. Remember that the left pedal is reverse-threaded compared to the right pedal. Once removed, clean and lubricate the threads before installing your new pedals to ensure they fit securely.
When installing the new pedals, tighten them in a clockwise direction for the right pedal and counterclockwise for the left pedal. With these simple steps, you’ll be able to change your bike pedals in no time and enjoy a more comfortable ride. Don’t forget to check that the new pedals are secure before taking your bike out for a spin. Regular maintenance, including pedal replacement, can keep your bike running smoothly and extend its lifespan.
Step 1: Fitting Right Pedal With Crank Arm
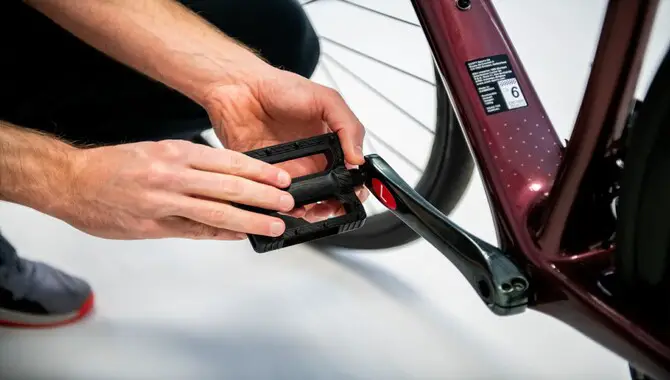
Before starting to install new bike pedals, ensure that you have identified the left and right pedals. When fitting the right pedal with the crank arm, use a pedal wrench or an Allen key and turn it clockwise.
Make sure to securely tighten it onto the crank arm. Repeat this process for fitting the left pedal with the crank arm. Always have proper tools handy and follow proper installation techniques to prevent damaging your bike’s spindle or bearings.
Step 2: Fitting Left-Hand Pedal
To fit the left-hand pedal onto your bike’s crank arm, ensure proper threading and apply some grease for improved wear resistance. With a pedal wrench and turn counterclockwise instead of the traditional clockwise direction for right pedals, achieve a secure fit with recommended torque specifications.
Before completing the installation of new pedals on your bike, ensure that they align properly with other components, such as the crank arm. Test ride your bike and check for security before heading out on longer rides.
Tips For Keeping Pedals Clean And Rust Free
By wiping your bicycle pedals regularly with a clean cloth and using rust inhibitor spray, you can keep them free of dirt and corrosion. Applying grease or lubricant to pedal threads when installing new pedals can make them easier to remove in the future.
Riders may benefit from investing in pedals made from aluminium or titanium for added durability. Following these straightforward tips will help keep your bike pedal’s longevity while ensuring problem-free cycling.
Left Vs Right Bike Pedals
Properly changing your bike pedals involves understanding the threading differences between left and right pedals. While the bicycle pedal on the right side is threaded clockwise, its counterpart on the left follows a counterclockwise thread.
To loosen these pedals, use a pedal wrench or hex key. Once removed, apply grease to the new pedals’ threads and secure them tightly with proper leverage using a torque wrench or spanner to prevent any mishaps during cycling.
Understanding The Right Pedal Threading
Changing bike pedals may seem hard, but with the right tools and knowledge, it can be a simple process. One important factor to keep in mind is the threading of the right pedal. The right pedal typically has a standard threading, meaning you turn it clockwise to tighten it and counterclockwise to loosen it. However, reverse-threaded pedals also require a counterclockwise turn to tighten and a clockwise turn to loosen.
It’s important to make sure you have the correct pedal wrench for your specific pedals and that you know which direction to turn them. By understanding the right pedal threading and having the necessary tools, changing bike pedals can be a quick and easy task for any cyclist.
Understanding Left Pedal Threading
Understanding left pedal threading is crucial when changing bike pedals. The left pedal has reverse threading, meaning it must be turned counterclockwise to remove it. Using the correct tool, like a wrench or Allen key, is important to avoid damaging the threads.
Always double-check that your pedals are securely tightened before riding to ensure optimal performance and avoid accidents. Additionally, applying grease to the new pedals before installation can increase longevity.
How To Differentiate Between Left And Right Pedals
When changing them on your bike, it’s important to know how to differentiate between left and right pedals. One easy way is to look for markings or labels on the pedals themselves. The letter “R” typically indicates the right pedal, while “L” indicates the left pedal.
Another way is to check the threads – the right pedal has standard threading and turns clockwise to tighten, while the left pedal has to reverse threading and turns counterclockwise to tighten. By identifying which pedal is which, you can ensure you’re using the correct tools and installing them correctly for a safe and efficient ride.
Greasing Bike Pedals Before Installation
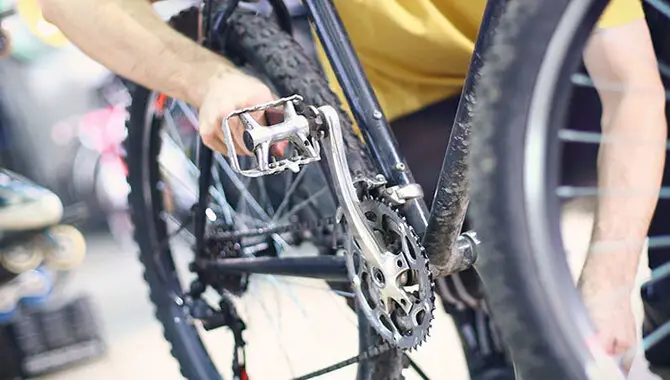
Applying grease to your bike pedals before installation is important in ensuring their longevity. Adding a thin layer of grease to the pedal threads can improve wear resistance and prevent rust and corrosion from forming. Additionally, greasing the pedals makes them easier to remove in the future, which can come in handy when it’s time for maintenance or replacement. Remember to use a non-toxic, waterproof, and heat-resistant grease for best results.
Understanding The Importance Of Torque Values
When installing new bike pedals, it’s essential to understand the importance of torque values. These values refer to the amount of force required to achieve a secure fit without damaging the crank arm or pedal threads. Using a torque wrench and following the manufacturer’s recommended torque specifications will ensure your pedals are installed correctly and securely.
Over-tightening can cause damage while under-tightening can lead to a loose fit and potential safety hazards. By taking the time to understand and follow proper torque values, you’ll be able to enjoy smooth and trouble-free cycling for years to come.
Using The Correct Wrench Or Allen Key For Pedals
To properly install new bike pedals, use the correct wrench or Allen key and avoid damaging the pedal or crank arm by using improper tools. Always match left-hand and right-hand pedals correctly by looking for markings such as “L” or “R”.
Apply grease to pedal and crank arm threads before fitting new pedals. Tighten securely without over-tightening to prevent damage. Regular maintenance and proper installation can extend the pedal lifespan and improve performance.
Common Mistakes To Avoid During Pedal Fitting
To ensure safe and secure bike pedal fitting, it’s vital to avoid common mistakes such as using the wrong tool, like an Allen wrench, instead of a pedal wrench, causing damage to pedals and crank arms. The right amount of torque is essential, as over-tightening or under-tightening can lead to loosened or broken pedals.
Other crucial steps include greasing the threads with lithium or marine-grade grease, checking compatibility before installing new bike pedals. And regularly maintaining them by cleaning grit and dirt.
How To Ensure Correct Axle Length For Pedals
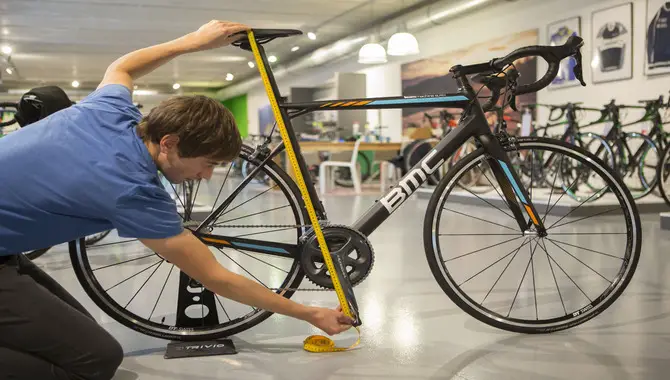
When installing new bike pedals, take the time to measure the distance between the crank arm and pedal hole. Add 5mm for clearance and ensure both pedals have the same axle length to maintain balance while riding. Double-check all measurements before fitting with a pedal wrench or Allen key.
Remember to use grease on the threads to prevent corrosion and avoid over-tightening with a torque wrench or spanner. With these tips, you can change bike pedals like an experienced cyclist.
Cycling And Bearing Maintenance For Pedals
To ensure your bike pedals’ longevity and smooth performance, cleaning and maintaining them regularly is important. Start by removing dirt or debris from the pedal body with a damp cloth, then use a brush to clean the bearings. If you notice any damage or wear and tear, replacing them as soon as possible is crucial to avoid further damage.
Lubricate the bearings with lightweight oil or grease, depending on the manufacturer’s recommendations. Finally, make sure to tighten all bolts securely before riding to prevent accidents or injuries. Proper pedal maintenance allows you to enjoy a comfortable and safe cycling experience for years. Remember, prevention is always better than cure, so make it a habit to regularly check your bike pedals. For any issues and fix them promptly.
What Is A Cleat, And How Do Fit Them
If you’re looking to change your bike pedals. It’s important to know what a cleat is and how to fit them properly. A cleat is a small piece of metal or plastic that attaches to the bottom of your cycling shoes and clips into the pedal. This allows for a more efficient transfer of power from your leg to the bike. To fit them, start by placing the cleat on the sole of your shoe in the desired position.
Use screws to attach it securely, making sure not to overtighten and damage the sole. Be sure to adjust the position of the cleat as needed for your comfort and riding style. Once installed correctly, clipping in and out of your pedals should be smooth and easy, improving your overall cycling experience.
Troubleshooting Knuckles And Pain In The Hands During Cycling
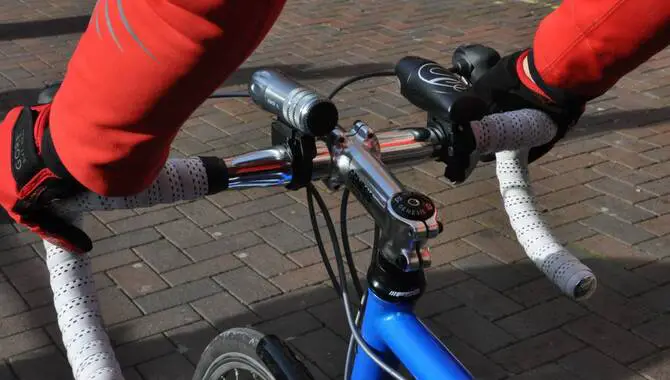
If you’re experiencing knuckles or hand pain while cycling, it’s important to address the issue before it worsens. One common cause is improper hand positioning on the handlebars. Make sure your hands are evenly placed and not gripping too tightly.
Another cause could be a poorly adjusted bike fit, leading to unnecessary pressure on the hands. Consider getting a professional bike fitting to ensure proper alignment and posture. Lastly, investing in padded gloves or grip tape can help alleviate discomfort. Remember, taking care of your hands while cycling will improve your performance and enjoyment of the sport.
Conclusion
Changing bike pedals may seem like a daunting task, but with the right tools and knowledge, it’s quite an easy DIY job. Make sure you have the right pedal for the right crank arm, remove your old pedals correctly, and be sure to grease your new pedals before installation. Remember to avoid common mistakes such as using the incorrect wrench or Allen key and not considering axle length.
And if you’re experiencing pain in your hands while cycling, it could be due to incorrect cleat fitting or improper bearing Maintenance. It’s also important to check that the new pedals are secure before riding. By following oour provided information, you can easily know how to change bike pedals and enjoy a smoother, more comfortable ride.
Frequently Asked Questions
1.Is It Easy To Change Bike Pedals?
Ans: Changing bike pedals can be a simple or challenging task based on your expertise and tools. Ensure you have the right pedals before attempting to replace them. A pedal wrench or hex key can simplify the process, while tutorials or consulting a mechanic can assist in case of uncertainty.
2.Do I Need A Special Tool To Change Bike Pedals?
Ans: Changing bike pedals requires specific tools like a pedal wrench or Allen key, depending on the type of pedal. Ensure compatibility with your bike’s crankset before purchasing new pedals. Consider seeking professional help if unsure about the process.
3.Is There Any Way To Fix My Pedal Without Buying New Ones?
Ans: The feasibility of fixing your pedal without buying new ones depends on the specific problem. Simple tweaks or small part replacements may do the trick, but severe damage or wear may require a complete replacement. Seek advice from a bike mechanic to determine your best course of action.
4.How Do I Know If My New Pedals Are Compatible With My Bike?
Ans: Before purchasing new pedals for your bike, ensure they have the same thread type and size as your current pedals. Consider your bike type, as certain pedals may be better suited for specific bikes. If in doubt, seek advice from a bike mechanic or research online.
5.Are There Any Maintenance Tips For Keeping My Bike Pedals In Good Condition?
Ans: To maintain your bike pedals, clean them regularly with soap and water to prevent dirt buildup, apply lubricant to the threads to avoid seizing, and check their tightness often. Promptly replace worn or damaged parts to prevent further damage to the pedal and crank arm.

I am passionate about writing blogs about bikes. I love riding my bike and love talking about it even more. My blog is the perfect place for anyone who loves biking as much as I do. Come check it out and learn some tips and tricks from me!